Portal Home > Knowledgebase > Managing Your Minecraft Server > FileZilla Guide
Download FileZilla
We recommend using a program called FileZilla to download and upload files to your Minecraft Server. FileZilla is a basic free-to-use program on various platforms.
To start you will need to download and install FileZilla on to your computer by clicking HERE.
Obtain FTP Settings
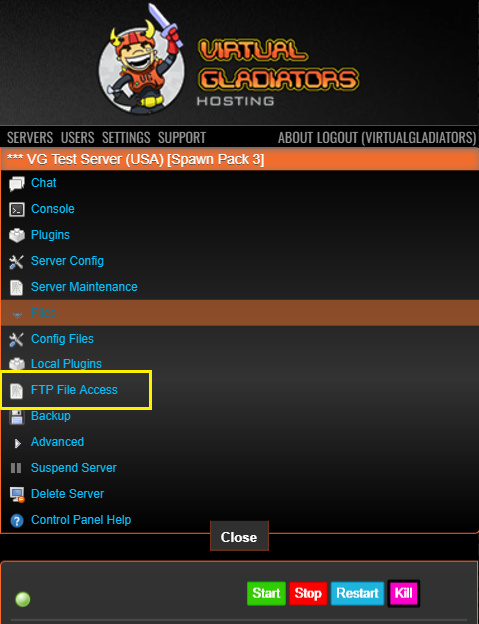
Before you can use FileZilla to connect to your server, you'll need your FTP login and password information You can find that information in your Multicraft control panel under Files, then FTP File Access:
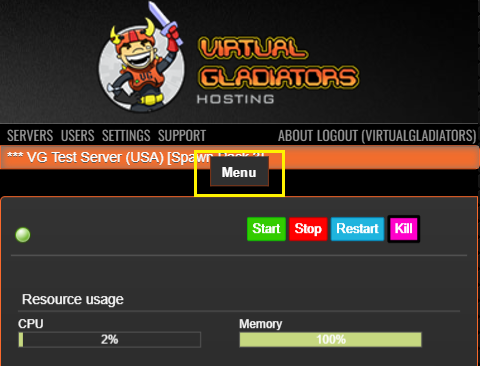
If you are on a phone or tablet, you first need to click on Menu at the top, then Files, then FTP File Access:
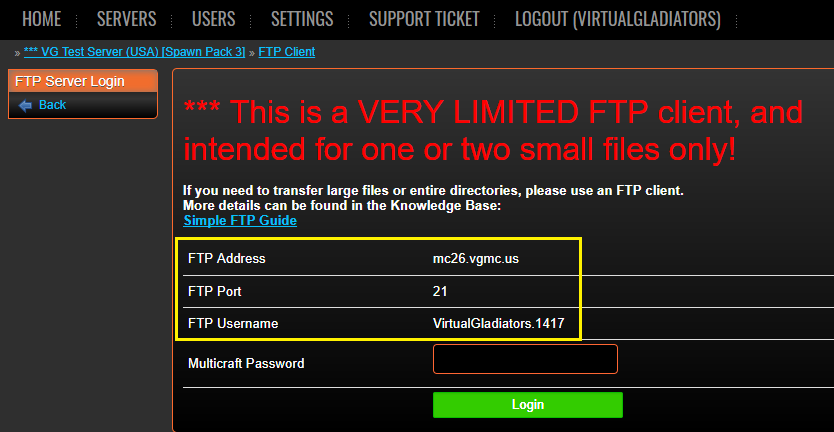
On the next screen, you'll see your FTP login information. Please note that the login is slightly different from your Multicraft login. This is in case you have multiple servers in the same Multicraft Control Panel, as each server must have its own login.
This is what our settings looks like. YOURS WILL BE DIFFERENT!
** The Multicraft Password box is only used if you are going to use Multicraft's built-in FTP feature.
Launch FileZilla
Now that you have the FTP login information, launch FileZilla. Enter your login information into FileZilla at the top, then click on Quickconnect:
Do not use the information I have used here, this is our information.
For the password, make sure that you use the SAME password that you use to login to the Multicraft Control Panel.
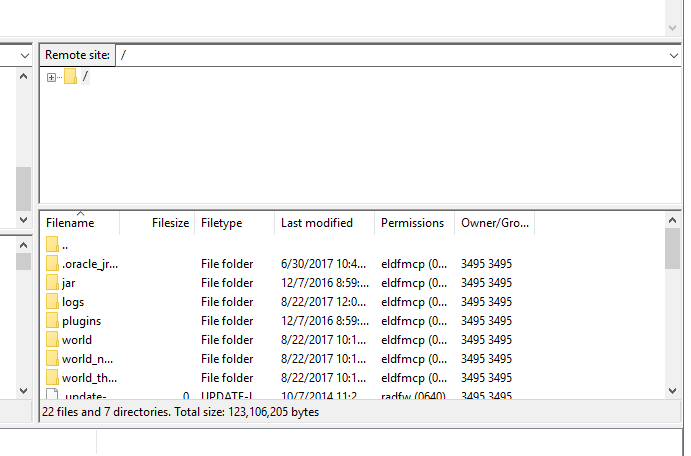
When you press quick connect you will start to see your server files load up on the right hand side of the screen:
Stop Your Server and Then Upload Your Files
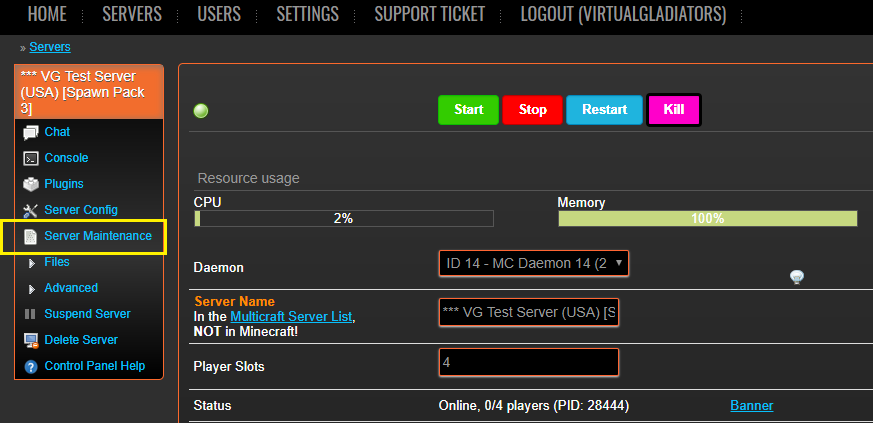
Now that you're connected to your server, you must first stop your server before changing any files or you will cause corruption. In Multicraft, click on the Stop button and wait for it to stop completely.
With your server stopped, you can now upload your files to your server. Make sure you delete any existing files first, such as your world. You can do this in FileZilla by right-clicking on a file or folder and then clicking on Delete. You can also delete your entire world and plugins using the Server Maintenance option in Multicraft. More on that in a minute.
** DO NOT DELETE MCMOD_CONTROLFILE!! That file is used by the VG MOD pack Install/Upgrade script to track which MOD pack you're using at the moment. If you delete it, all of your server's files will be archived to a .zip and then deleted.
Uploading Your Own World
If you are going to upload your own world to your server, you'll need to delete the world folder first. The easiest way to do this is in Multicraft under the Server Maintenance section:
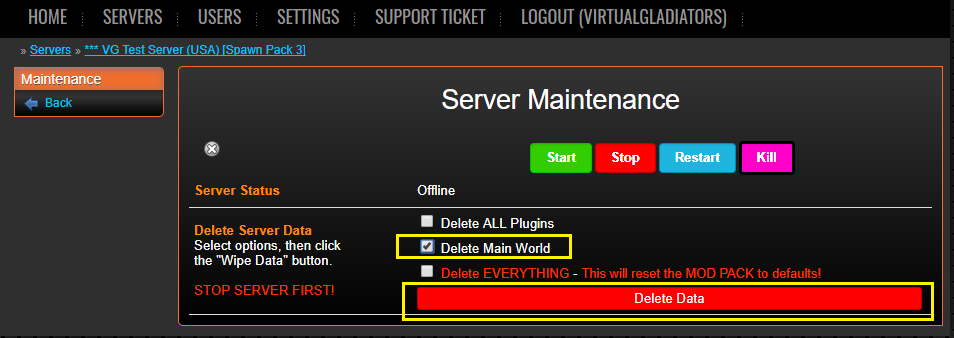
Click on Stop, select the "Delete Main World" checkbox only, then click on the "Delete Data" button once the server is Offline:Once it completes, go back to the main Multicraft page and confirm the name of the world that is currently configured:
If it's blank, then the world name configured is just "world" (no quotes).
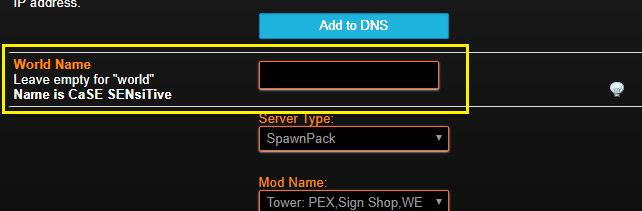
Back in FileZilla, use the left pane to navigate to where your world is located on your computer. If the world name does not match what's configured in Multicraft, go back to Multicraft and change the world name so it matches the folder you're going to upload. It IS case-sensitive, so make sure you enter it exactly as it appears on your PC. Don't forget to click the Save button after changing the world name!
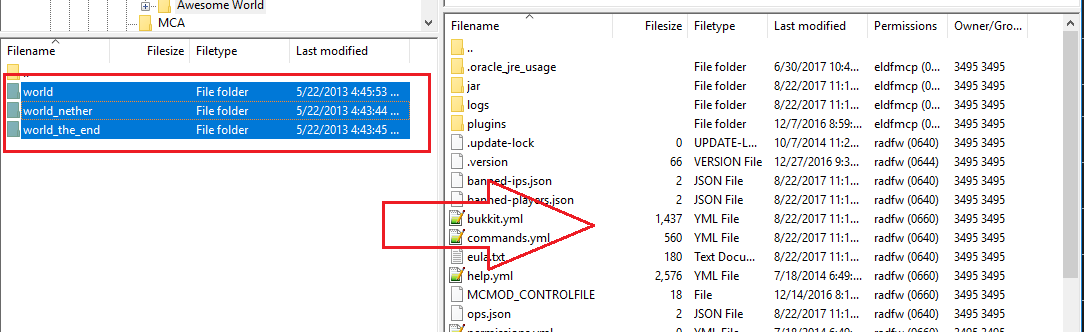
** If you have builds in The End or Nether, you'll need to upload those folders as well using FileZilla.
In this example, the world name is just world, and there are three folders that need to be uploaded. Highlight all relevant folders by either dragging a box around them with the mouse, or clicking each one while holding the CTRL key on your keyboard, then drag and drop to the right panel to begin the upload. ** Make sure you drop into an empy area and not another folder:
Once the transfer begins, you can watch the status at the top of FileZilla:
** If the world name you're uploading is not "world" (no quotes), you'll need to change the world name in Multicraft so that it matches the world name you uploaded EXACTLY. Scroll up in this guide if you don't know how to do that.
Wait for it to finish, and then start up your server. Watch the console for errors.
Troubleshooting
Once you login to the server, if the world is not what you expected, it's probably because of one of these issues:
- The name of the world folder doesn't match the name of the world configured in Multicraft.
Scroll back up this guide and re-read the section about updating the world name to match your world.- The spawn point is different.
If you've uploaded a single-player world, the initial spawn point WILL BE DIFFERENT. You will have to use F3 in your client in single-player mode to get the exact coordinates of spawn, then tp yourself to that location on your server. You can then use in-game commands to set the initial spawn point to that location. The command should be /setworldspawn, but if you have Essentials instealld, you can also use /setspawn
 Add to Favourites
  Print this Article